Quick Start Guide
To start using a new instance of the Geospatial Tracking System (GTS), the GTS system administrator will initiate your Organization and create your Organizational Focal Point login, you can then manage all aspects of your organization in the GTS.
When you receive your credentials, you can log in to the GTS Dashboard and begin to define your organization’s parameters.
Note
Before the first login, a Password must be created, to perform this use the GTS Change Password functionality
which is documented.
This is only available for logins that have been assigned an e-mail address.
You’ll want to consider which Field Activities to track, and which Field Staff will be using the GTS for your organization. Your choice of field activity and field staff will influence phone preparation options. The GTS Mobile Application will also need to be installed on Android devices used in the field.
Field Activities
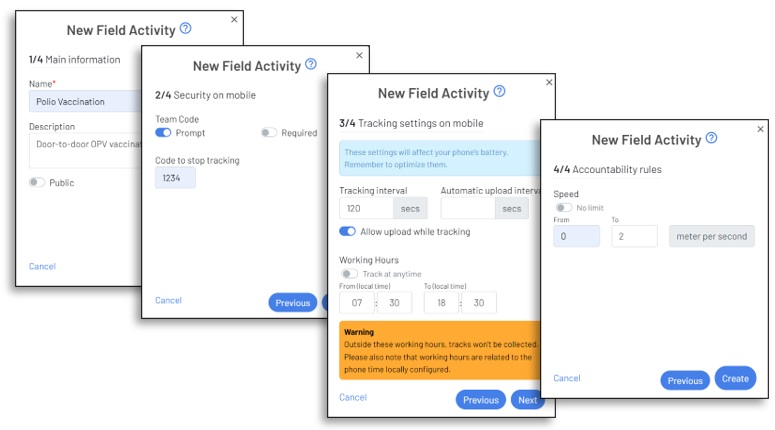
Field activities require a code and a name, all other settings are optional.
Code: A short name to identify the activity.
Name: Provides a longer more descriptive name to the field activity.
Optional settings include:
Description: To provide greater detail about the field activity than the name.
Tracking Interval: How often tracking points will be collected (by default every 120 seconds).
Upload Interval: If you wish to have tracking data uploaded automatically
Working hours: Limits when tracks are collected, if left blank tracks will be collected 24 hours a day. (Setting working hours may preserve field staff privacy and extend battery life duration.)
Whether or not the field activity is Public and can be viewed by other organisations.
Whether to use Team Codes should several teams be performing the activity, and should you not know the field staff individually.
The Speed that a field staff is moving to consider tracks to be valid
A Stop Tracking Code that the field staff must enter to stop collecting tracks
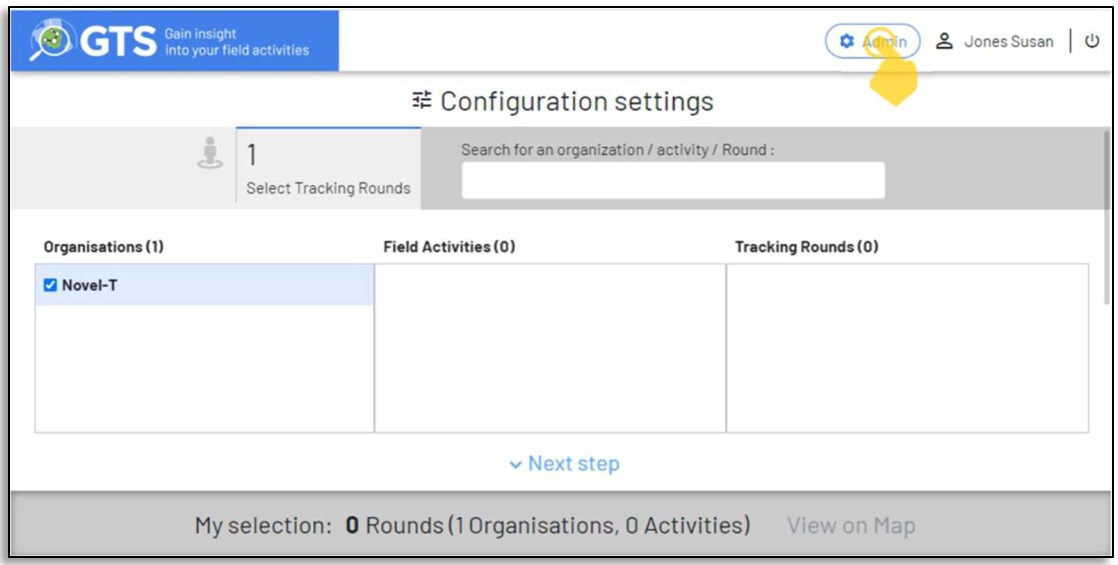
Login to the GTS Dashboard at https://gts.health/
Click on the
 button to open the administration console
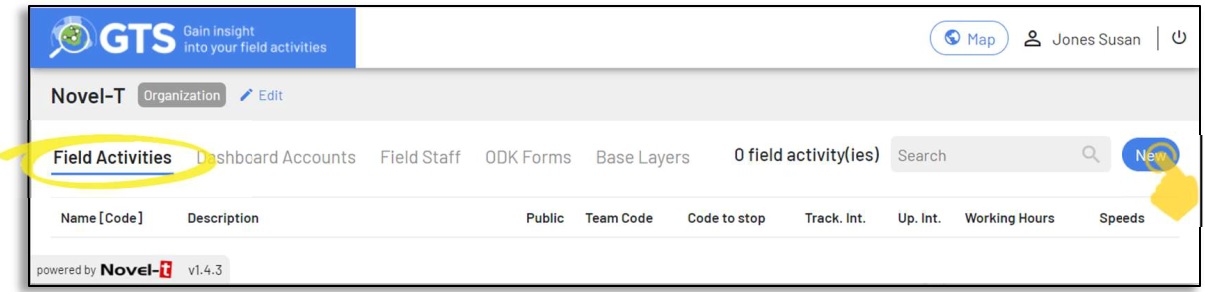
Click on the
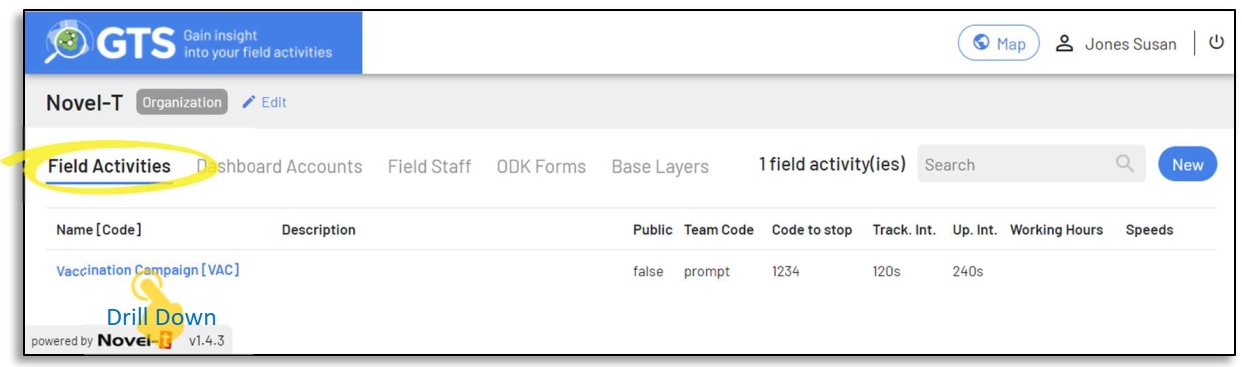
 button with the Field Activities tab selected
Enter the settings that define your field activity into the pop-up forms presented and then click on the Create button.
The field activity now exists, click on the pencil icon if you wish to edit it.
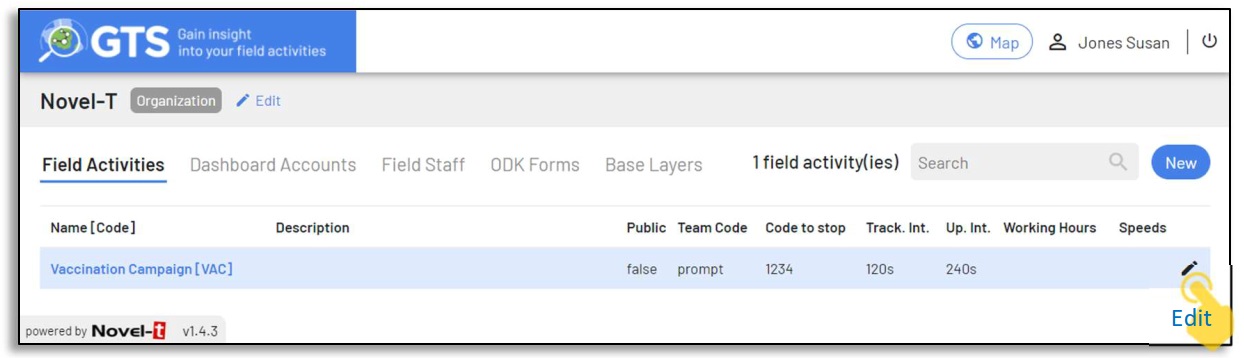
For further details see the Field Activities section of this guide
New Field Activities can be easily created in about a minute The below video demonstrates how to create a new Field Activity
Users
Users may be divided into Dashboard Accounts and Field Staff, and the same individual may be both at once.
Dashboard Accounts: Those who use the web application, as Organizational Focal Point, you are the first
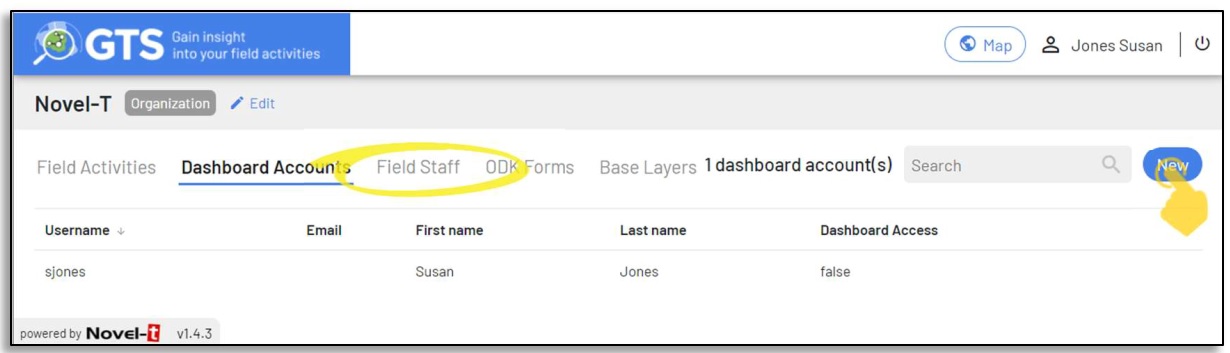
dashboard user and you may add others as desired by selecting the Dashboard Account tab and clicking
on the button.
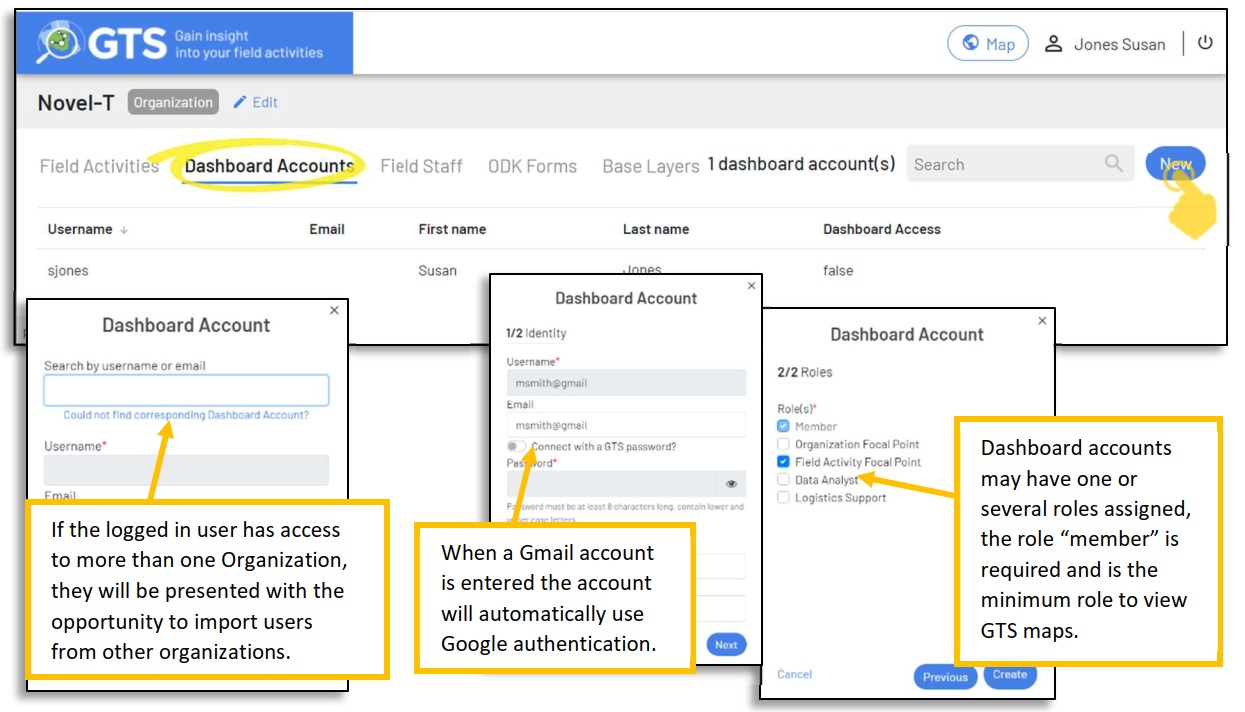
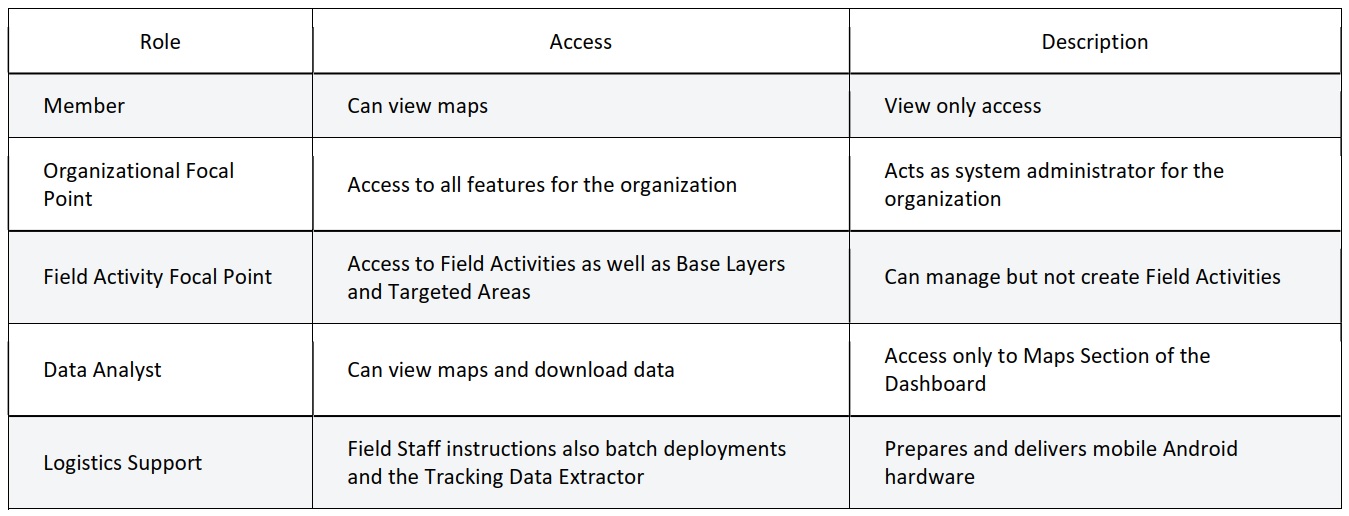
User Roles and Permissions: User roles define the level of access granted to a Dashboard Account
For further details see the Dashboard Accounts section of this guide
Field Staff: Those who will be using the Mobile Application and have their movements tracked,
can be either assigned to individual persons (nominative) or shared across a team (generic). You may add
Field Staff by selecting the Field Staff tab and clicking on the button.
For further details see the Field Staff section of this guide
New Field Staff can be easily created and assigned to a Field Activity The below video demonstrates how to create a new Field Staff
Mobile App Deployment
The GTS offers two principal methods to prepare phones:
A user self-service install: This enables users to download and install the mobile application
A batch deployment install: This allows an administrator to install the application on Android phones destined for generic users
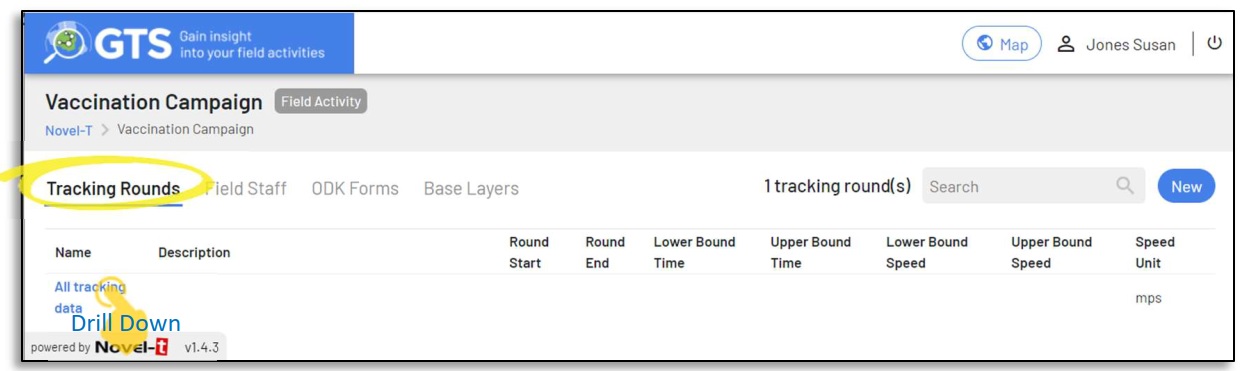
Click on the name of the Field Activity to drill down
Click on the name of a Tracking Round to drill down
Select the Logistics Support tab to view the options for phone preparation methods available: Batch Deployment or Field Staff Instructions.
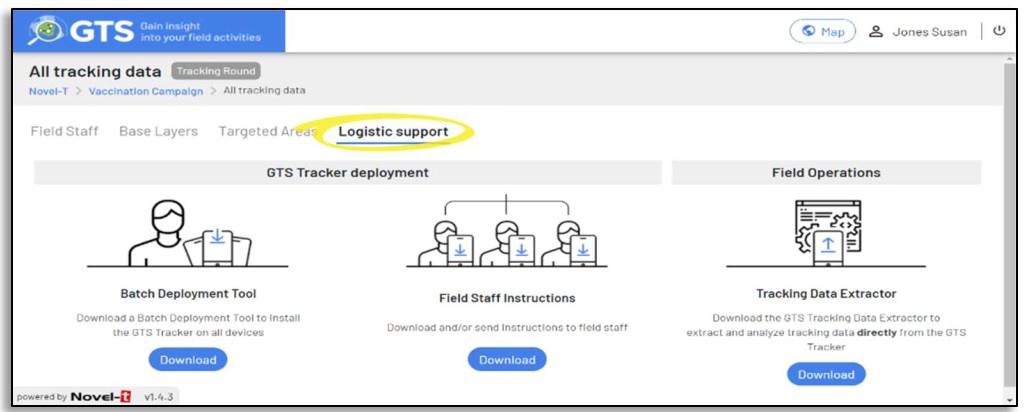
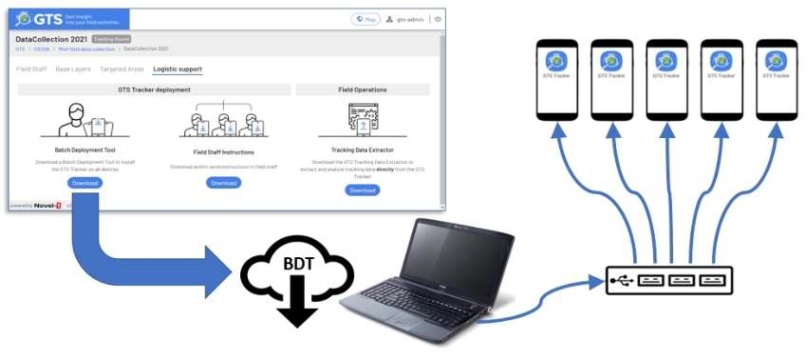
Batch deployment may only be used for generic accounts, a small program will be downloaded to your computer. This software is used to deploy the mobile application to Android phones connected to your computer by USB (a USB hub is suggested to deploy to several phones simultaneously).
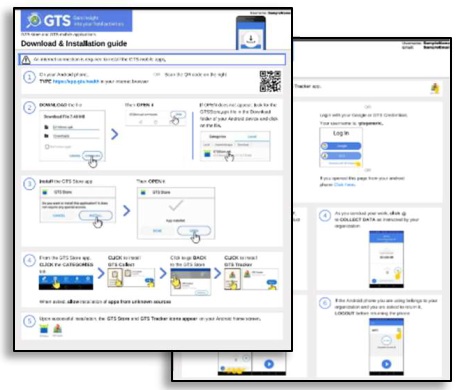
Field Staff Instructions enable the sending of email instructions directly to field staff or download a .zip file with the 2-page instructions included.
For further details see the Field Staff section of this guide
The GTS Mobile app can be easily deployed using the Batch Deployment Tool The below video demonstrates how to deploy the GTS mobile application using the Batch Deployment Tool
The GTS offers further features to enhance field activity tracking and analysis including:
> The incorporation of ODK forms for active data collection during field activities.
> The use of Tracking Rounds to isolate instances of a Field Activity
> Uploading of Geospatial Base Layers and Targeted Areas for aggregated analysis of field activities performed.
Note
The GTS is designed to be intuitive and easy to use, if you have any questions for which you cannot find an answer in this user guide please reach out to us at: